Proper earthing is one of the most critical components of any electrical system. It ensures that in case of electrical faults, excess current is safely transferred to the ground, protecting both people and equipment from electrical hazards. Among various earthing materials, copper earthing electrodes are highly preferred due to their excellent conductivity, corrosion resistance, and long-lasting durability.
In this blog, we’ll guide you through how to properly install copper earthing electrodes for safety, the materials required, the step-by-step installation process, and why choosing the right Copper Earthing Electrode Supplier in Mumbai is vital for long-term electrical protection.
Understanding Copper Earthing Electrodes
What Are Copper Earthing Electrodes?
Copper earthing electrodes are conductive rods made of pure copper or copper-bonded steel that provide a low-resistance path to dissipate fault current into the ground. These electrodes form a crucial part of the grounding system in residential, commercial, and industrial setups.
Their popularity stems from copper’s inherent properties — superior conductivity, resistance to corrosion, and long lifespan. Using copper earthing electrodes in Mumbai ensures reliable electrical performance in diverse soil and weather conditions.
Why Proper Installation Matters
Improper earthing installation can lead to unsafe grounding, voltage fluctuations, equipment damage, and even life-threatening electric shocks. A well-installed copper electrode minimizes electrical hazards, stabilizes voltage, and ensures smooth operation of electrical systems.
Whether you’re setting up a new electrical system or upgrading an old one, following the correct installation steps will ensure maximum safety and performance.
Materials Required for Installation
Before starting the installation, make sure you have the following materials and tools:
- Copper Earthing Electrode (pure or copper-bonded)
- Bentonite powder or charcoal and salt (for soil enhancement)
- Earthing pit cover and chamber
- Copper strip or wire for connections
- Water for backfilling
- Spade or digging tools
- Earth resistance tester (to verify readings)
Step-by-Step Guide to Installing Copper Earthing Electrodes
Step 1: Choose the Right Location
Select an area with moist soil — preferably away from building foundations and concrete structures. The moisture in the soil enhances conductivity, improving earthing efficiency.
If the soil is too dry, consider using bentonite powder or a soil-enhancing compound to maintain adequate moisture around the electrode.
Step 2: Dig the Earth Pit
Dig a pit that is typically 2.5 to 3 meters deep and about 300 mm in diameter (depending on soil conditions). The pit size should accommodate the full length of the copper earthing electrode.
Ensure the pit’s sides are stable to prevent collapse during installation.
Step 3: Insert the Copper Electrode
Carefully place the copper earthing electrode vertically into the center of the pit. The electrode should make direct contact with the soil, as proper grounding depends on solid earth contact.
Avoid hammering directly on the top end of the electrode, as it can deform or damage the copper surface. Use a driving head or mallet for gentle insertion if required.
Step 4: Prepare the Backfill Mixture
To enhance conductivity, prepare a backfill mixture using bentonite powder, charcoal dust, and salt in a 1:1:1 ratio. This mixture surrounds the electrode and improves the flow of fault current into the ground by reducing resistance.
Pour this mixture around the electrode in layers while filling the pit.
Step 5: Add Water and Compact the Soil
Once the backfill is done, pour water into the pit to moisten the soil mixture. This helps the compounds settle properly and improves contact between the electrode and surrounding soil.
Compact the soil gently after every few layers to eliminate air gaps.
Step 6: Install the Earthing Chamber
Place a protective earthing chamber or cover on top of the pit. This cover allows easy access for maintenance, testing, or watering the electrode periodically.
Mark the chamber for identification to ensure it’s not accidentally covered or damaged during future construction work.
Step 7: Connect the Earthing Strip or Wire
Use a copper strip or wire to connect the electrode to the main electrical panel. The connection should be tight, corrosion-free, and mechanically secure.
Apply an anti-corrosive compound on joints to enhance longevity. The joint resistance should be minimal to ensure smooth current transfer during fault conditions.
Step 8: Test the Earth Resistance
Once the installation is complete, measure the earth resistance using an earth resistance tester. Ideally, the resistance value should be below 1 ohm for optimal performance.
If the reading is high, recheck soil moisture and ensure all connections are properly secured. Re-watering and adding bentonite or charcoal can help reduce resistance further.
Maintenance Tips for Copper Earthing Electrodes
- Regularly Water the Pit: Keep the soil around the electrode moist to maintain low resistance.
- Check Resistance Annually: Test the earthing resistance periodically to ensure it stays within safe limits.
- Inspect Connections: Look for corrosion or loose joints and fix them promptly.
- Re-fill Compounds: If the resistance increases over time, add fresh bentonite or charcoal mixture to the pit.
Proper maintenance ensures the copper earthing electrodes continue providing a safe electrical grounding system for years.
Benefits of Using Copper Earthing Electrodes
- High Conductivity: Copper provides superior current-carrying capacity compared to GI or steel.
- Corrosion Resistance: Ensures durability even in harsh or acidic soil conditions.
- Low Maintenance: Once installed correctly, requires minimal upkeep.
- Long Lifespan: Can last for decades without significant degradation.
- Stable Resistance: Maintains consistent resistance values, ensuring reliable grounding.
When you choose a reliable Copper Earthing Electrode Supplier in Mumbai, you ensure the use of quality-tested materials that meet international safety standards.
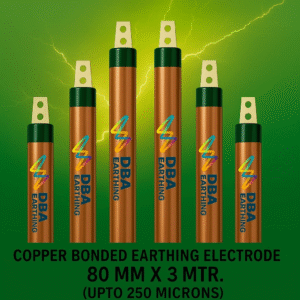
Why Choose DBA Earthing for Your Copper Earthing Needs
At DBA Earthing, we are committed to delivering high-quality, long-lasting copper earthing electrodes in Mumbai. Our electrodes are engineered with precision to meet diverse electrical and industrial requirements. As a trusted Copper Earthing Electrode Supplier, we ensure excellent conductivity, corrosion resistance, and safety performance in every product.
Whether for residential, commercial, or industrial installations, DBA Earthing provides reliable grounding solutions that ensure maximum electrical safety and system stability. Visit our website to explore our full range of earthing products and professional installation services.
Frequently Asked Questions (FAQs)
1. What is the purpose of copper earthing electrodes?
Copper earthing electrodes provide a low-resistance path for electrical faults, ensuring the safe dissipation of current into the earth and preventing equipment or human damage.
2. Why are copper earthing electrodes preferred in Mumbai?
Due to Mumbai’s coastal climate, copper’s corrosion resistance makes it ideal for long-term grounding performance, ensuring stability even in moist or saline soil.
3. How do I choose the right Copper Earthing Electrode Supplier?
Look for a supplier with certified products, transparent pricing, and proven installation expertise. DBA Earthing is a trusted name in Mumbai offering top-quality electrodes.
4. How often should I test my copper earthing system?
It’s recommended to test the system at least once a year or after major electrical upgrades to ensure proper functionality and safe resistance levels.
5. Where can I buy reliable copper earthing electrodes in Mumbai?
You can purchase high-quality copper earthing electrodes in Mumbai from DBA Earthing, a reputed Copper Earthing Electrode Supplier offering durable and tested grounding products.